Some facilities charge renters not by the hour, but by blocks of time. The blocks of time can be decided by a number of factors including Weekday vs. Weekend pricing, Half-Day vs. Full-Day, and Daytime vs. Nighttime pricing. Spotz allows admins to set their prices through pricing templates.
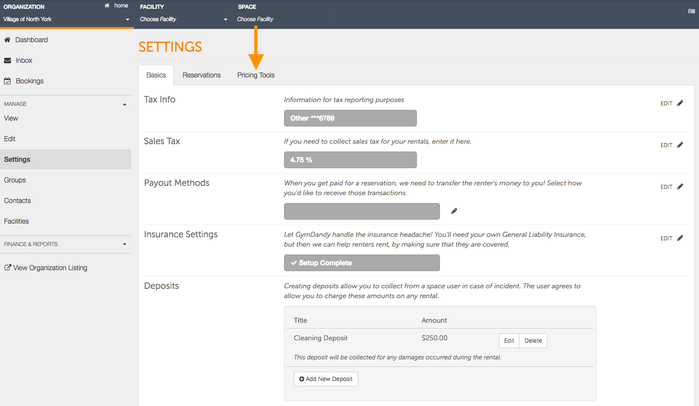
- To begin creating your pricing template, start by clicking on Settings located on the left-hand side of the organization page.
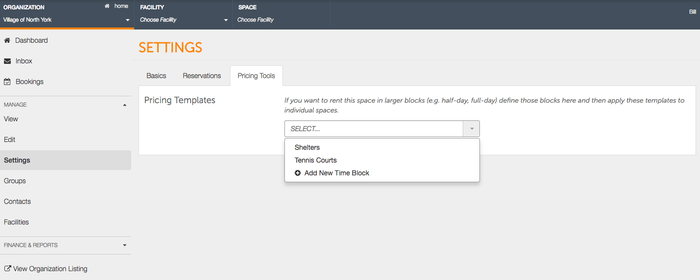
- Once on the settings page, navigate and click on the Pricing Tools tab.
- Once on the Pricing Tools tab, you will have an option for Pricing Templates. You can click the dropdown to edit an existing pricing template or click on +Add New Time Block to create a new pricing template. Click on +Add New Time Block to begin getting started in creating your pricing template.
- Once clicking on +Add New Time Block, you will begin inputting information related to your pricing template. The first thing to do is to enter a template name. The template can be used at a variety of spaces so choose an appropriate name, such as "Shelters", "Tennis Courts", or something similar. For this example, we will name the template "Veteran's Park Shelter" as the template will be applied to the Veteran's Park Shelter.
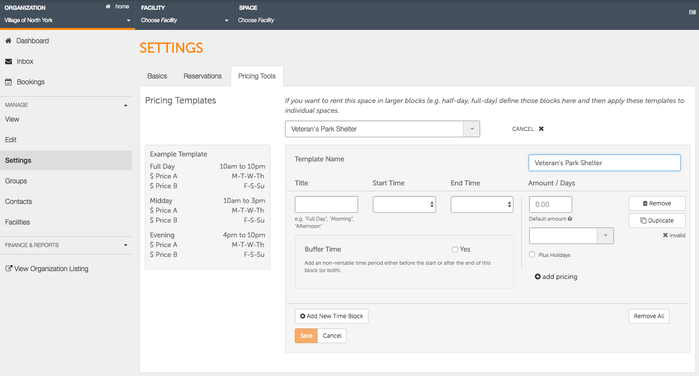
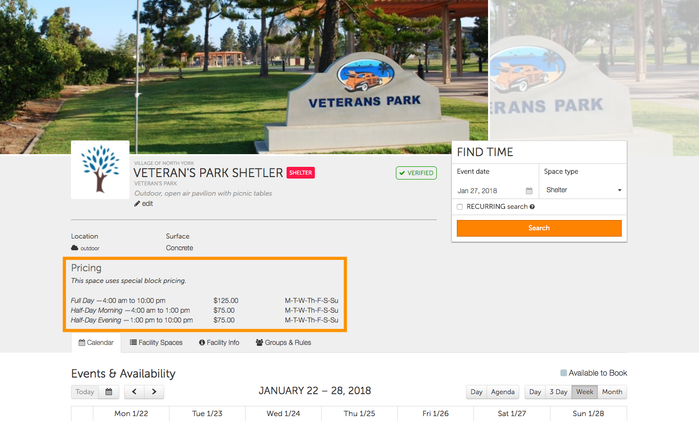
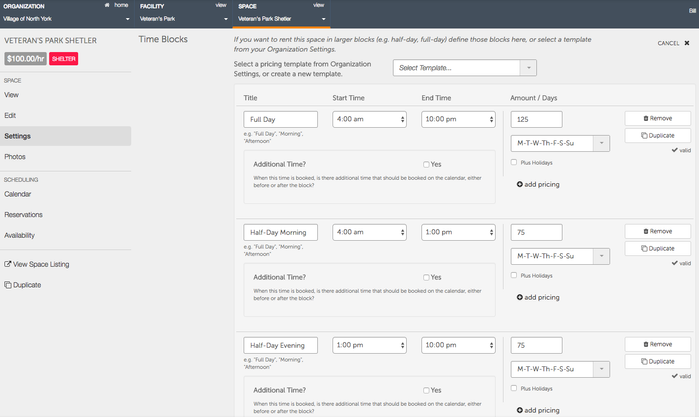
- Next, you must input a Title. This is not a "Template" title, but rather a title related to the pricing blocks - you can have multiple pricing blocks so the title could be "Full-Day", "Half-Day", "Weekday", "Weekend", etc. We will be using "Half-Day" and "Full-Day" as an example. Type in "Full-Day" into the Title field and choose a Start Time and End Time that would apply to a Full Day such as 4:00am until 10:00pm.
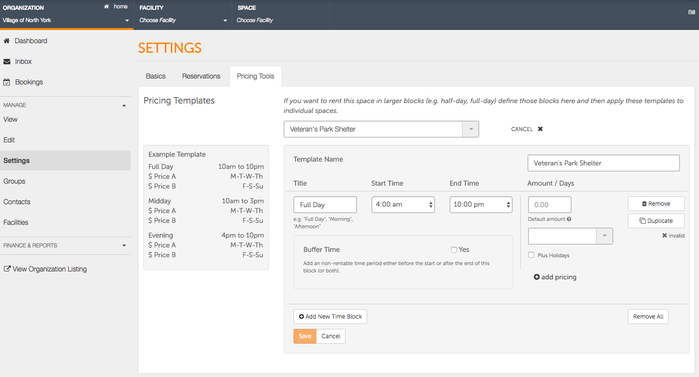
- Once entering in the Title, Start Time and End Time, you will set a price and the days that the price applies to. For this example, I will set the Full Day price at $125 and that will occur every day of the week. You may also apply different prices for different days of the week such as weekends and holidays.
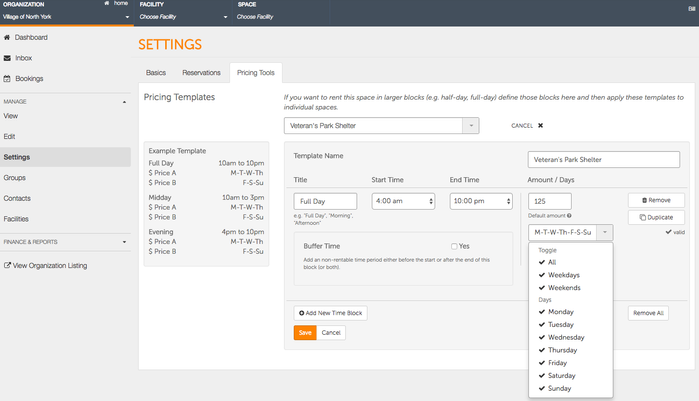
- If you are only charging one price for every day of the week, you may click save to save the pricing template. To add an additional price block to apply to weekdays, click +Add Pricing, or if you would like to create a Half-Day price, click +Add New Time Block. We will be adding two additional time blocks to account for Morning and Evening prices.
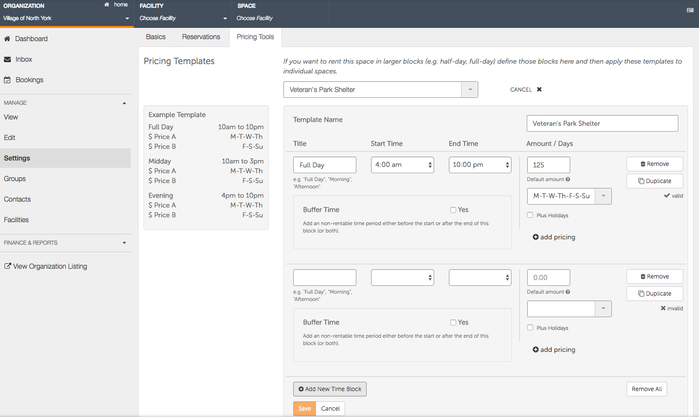
- After clicking +Add New Time Block, you may repeat the instructions in step 6 to finishing creating the Half-Day Morning time block. You can then click +Add New Time Block once again to create the Half-Day Evening block as well.
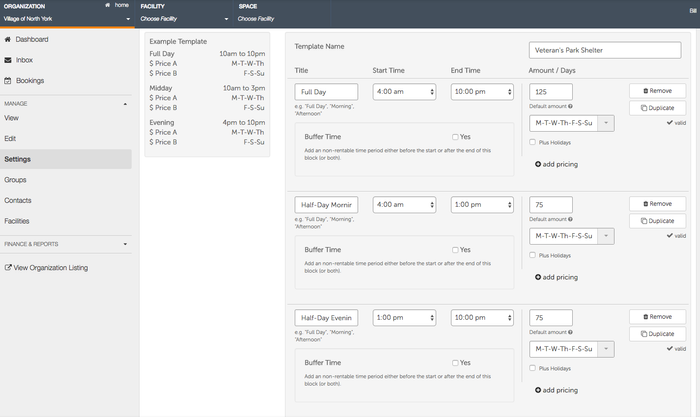
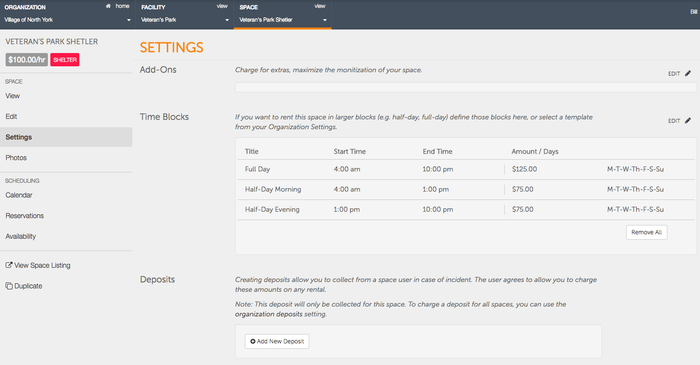
- When finished creating all of your time blocks, click Save. You will receive a Save Success notification alerting you that your Pricing Template has successfully been created

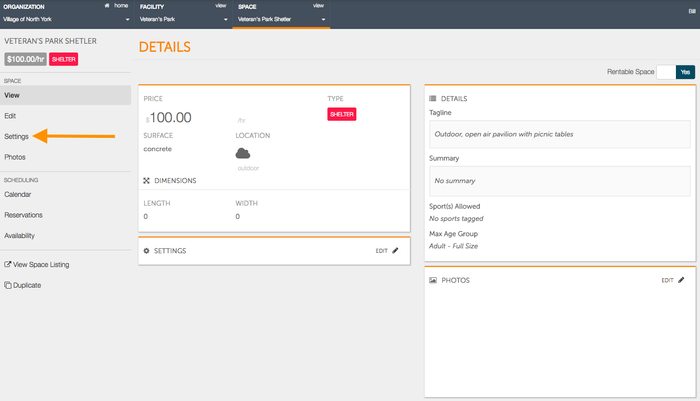
- Now that your Pricing Template has been created, you must apply it to a space for the prices to be set. To do so, begin by choosing the space that you would like to apply the pricing to.
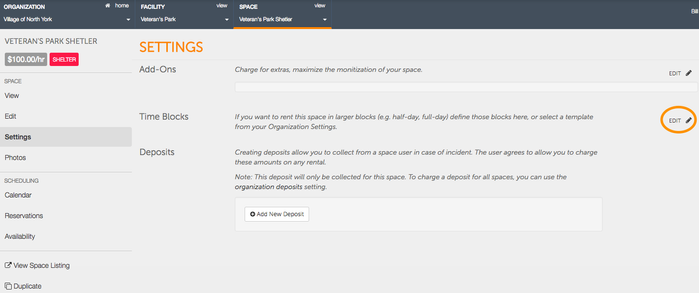
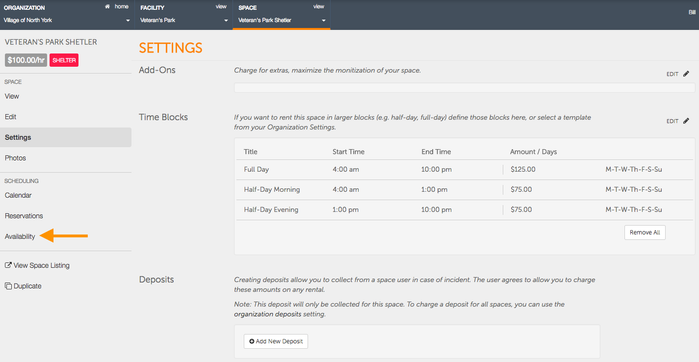
- On the Space page, begin by clicking settings to apply the pricing template.
- On the Settings page, find the Time Blocks heading and click Edit on the right hand side to choose your pricing template.
- Once you click Edit, you will have two choices - Choose an existing pricing template or +Add New Time Block. Since we already created the Veteran's Park Shelter pricing template, we will apply this template to the space. Had we not previously created a template, we could click +Add New Time Block which would let us create a pricing template for that specific space.
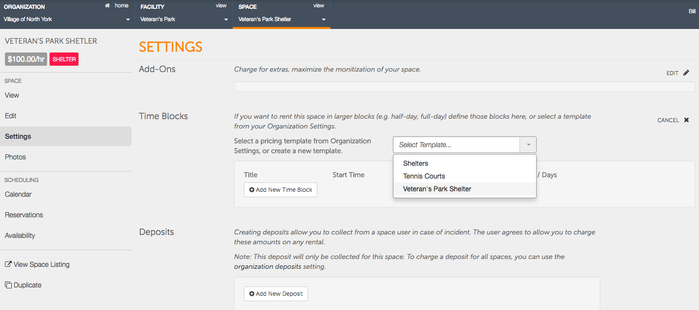
- Clicking on the Veteran's Park Shelter template will autofill the time blocks to reflect the recently created template. If everything looks acceptable, click Save to continue.
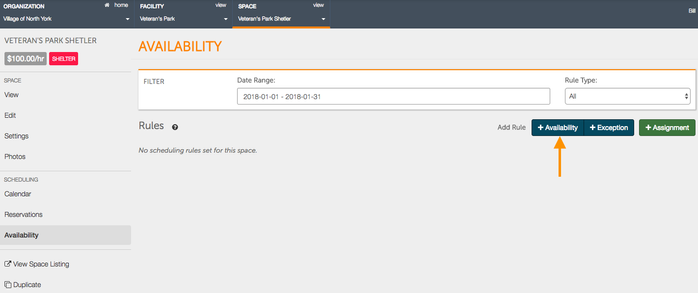
- After clicking Save your pricing template is now applied to the space. Before you are finished; however, you must create availablity and choose the Time Block for renters to reserve the space and adhere to the pricing template.
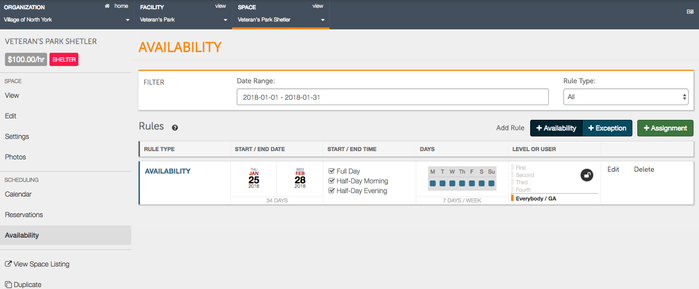
- Click on Availablity to begin creating Availablity.
- On the Availablity page, click on +Availablity to create the Availablity blocks.
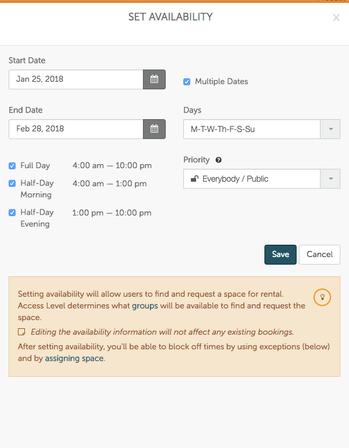
- When setting availablity, you may choose either a single day or mutliple dates. If you are choosing multiple dates, click Start Date to choose the day the availability will begin on and then proceed to click End Date to choose the day the avialblity will end on. After choosing your start and end date, you may also choose the days of the week that you would like to apply the availability to.
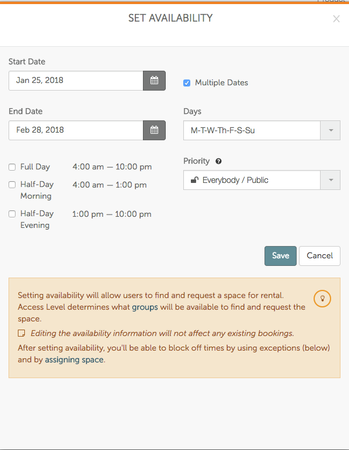
- Once you have chosen your dates and days of the week, you may then choose the pricing blocks that you would like to apply to the availability. Click on all of the applicable pricing blocks that you would like. You may then set your priority level if you choose to limit who is allowed to rent. When finished, click Save to apply the availability.
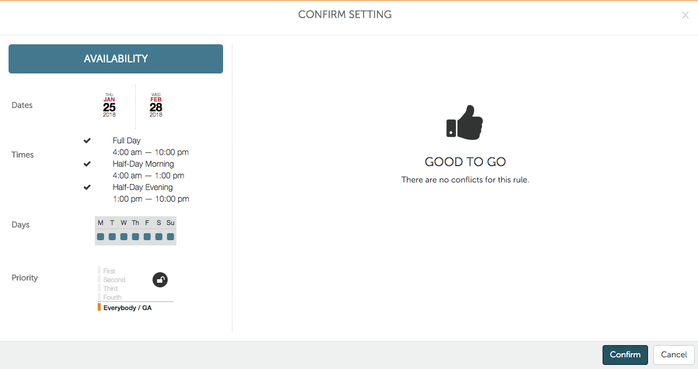
- Upon clicking Save, the system will check for any potential conflicts in your availability. If everything looks good, click Confirm to finish.
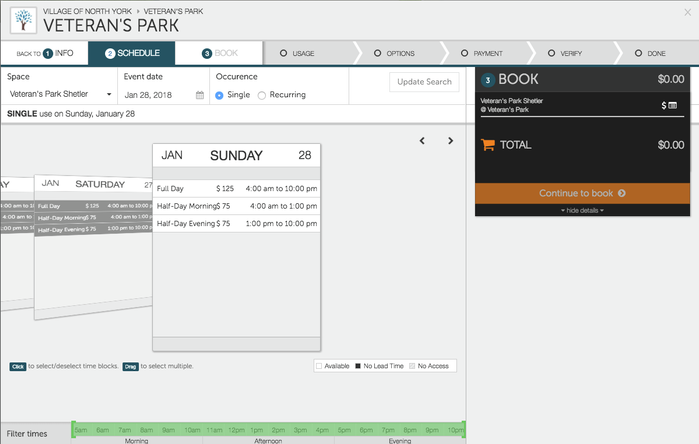
- Your availablity is now created. When renters go to book the space, they will see the pricing block options and get to choose one of the blocks to rent (Morning, Evening, Full-Day)