here are times when you will need to create a rental for another user - a user may come up to your front desk to make a rental in person or you may need to make a rental for a user as they are unable to do so.
Creating A Rental For Another User
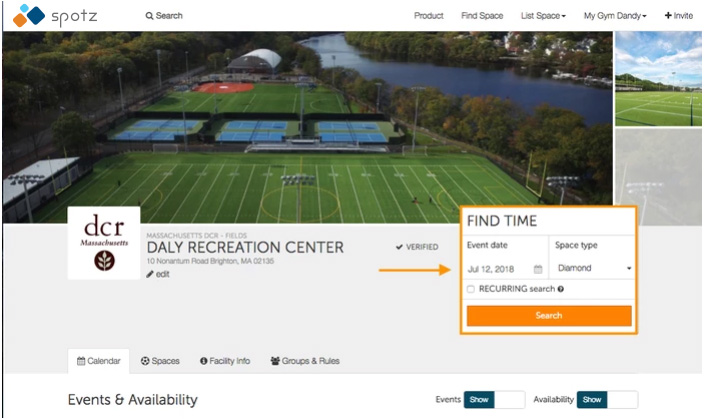
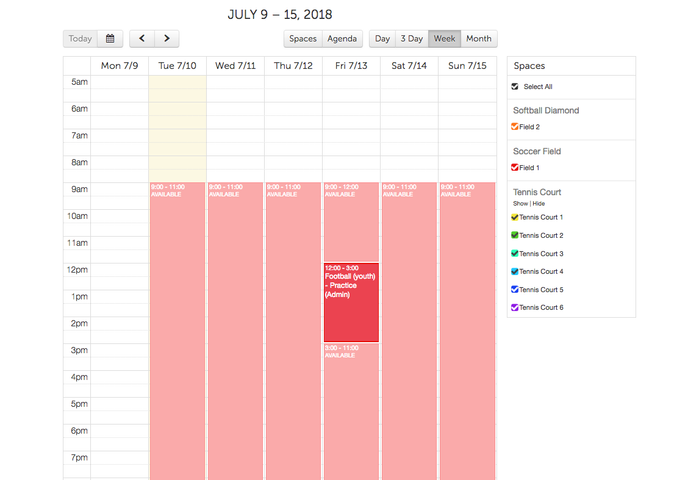
- Begin by choosing the facility that you would like to rent for your user. Once you are on the facility page, you can search by either choosing a date and space type from the "Find Time" box to the right or by clicking on a specific date below on the calendar.
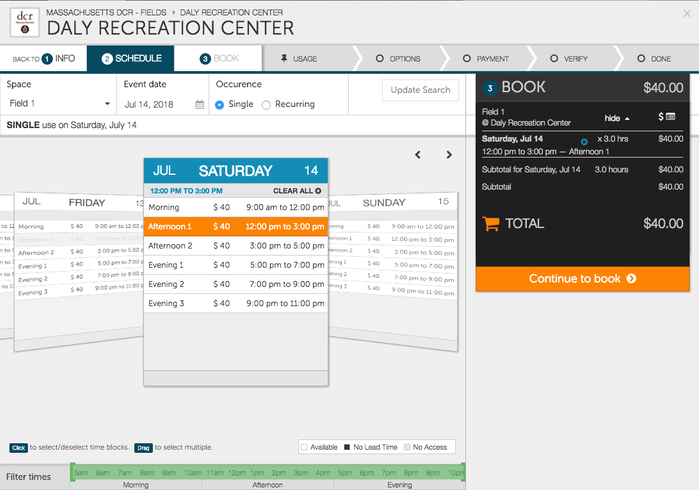
- Once you have selected your date, the booking window will appear displaying available dates and times. Click on the date and time that you would like to book. Once you have clicked on the date(s) and time(s), click on Continue to Book to proceed.
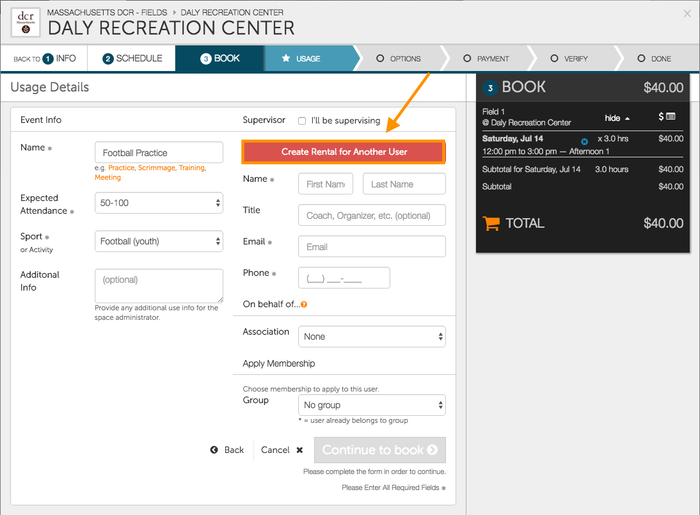
- Once you have clicked Continue to Book, you will be brought to the Usage Details page. Begin inputting the event information including reservation name, expected attendance and sport. Next, click the big red button that is titled "Create Rental for Another User".
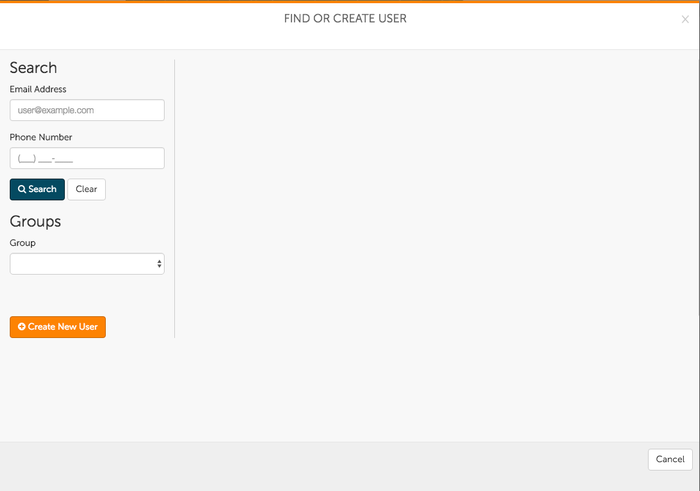
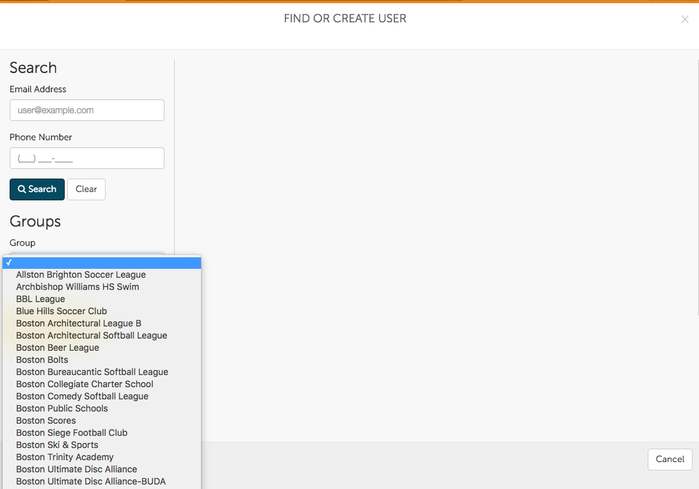
- Clicking on the Create Rental for Another User button will take you to the Find or Create User window. You now have the option of creating a new user to make a rental for, or searching for an existing user to make the rental for. To search, you may either enter in the user's email address or phone number and click search to find the user. You may also choose the user from their rental group. Click on the Group dropdown to look for existing groups.
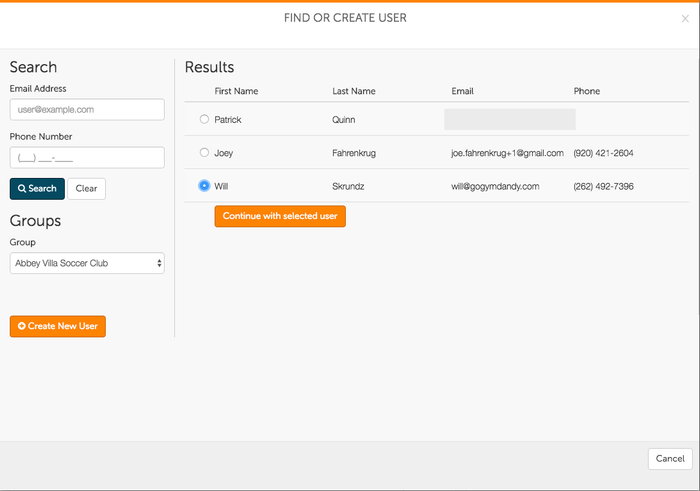
- Choose a group from the dropdown menu and the members of the group will populate across the page. Click on the member of the group that you would like to make the rental for, and click Continue with Selected User to proceed.
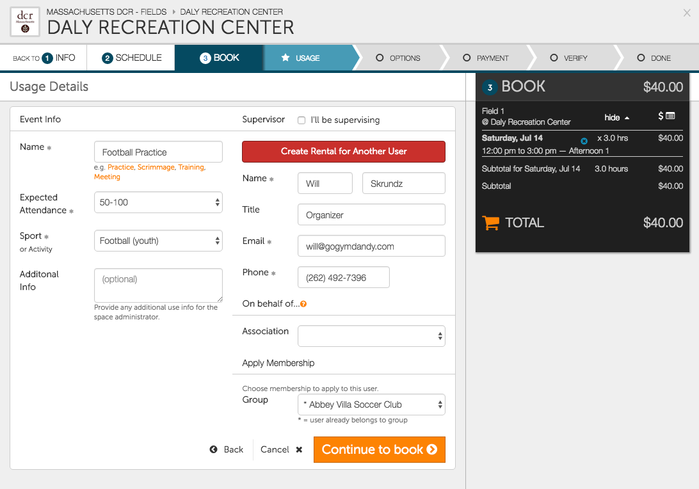
- Once you have clicked Continue With Selected User, you will be brought back to the Usage Details page. The renter that you have selected will autofill the renter details fields. If you are satisfied with the details, click Continue to Book to proceed.
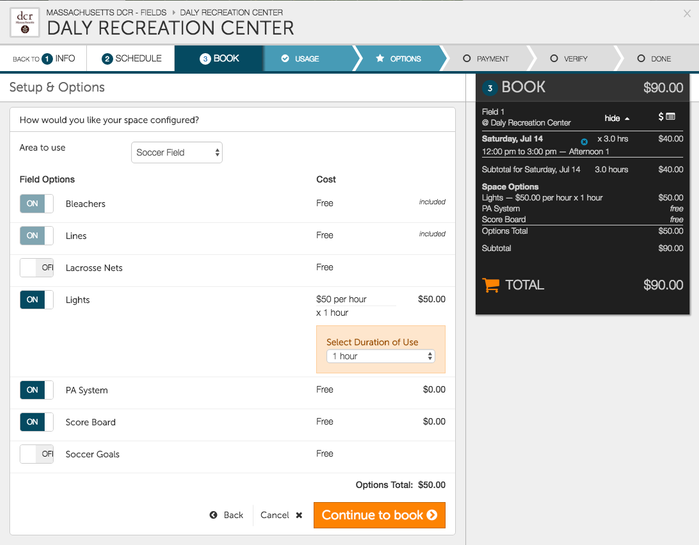
- After continuing to book you will be directed to the Setup & Options page. Choose any applicable add-ons and setup items the renter may need for their rental. When you have picked the add-ons, click Continue to Book to proceed.
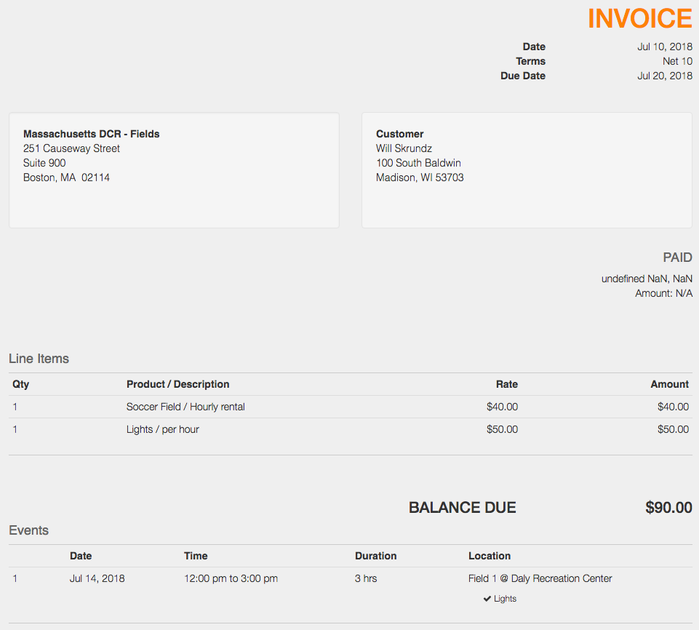
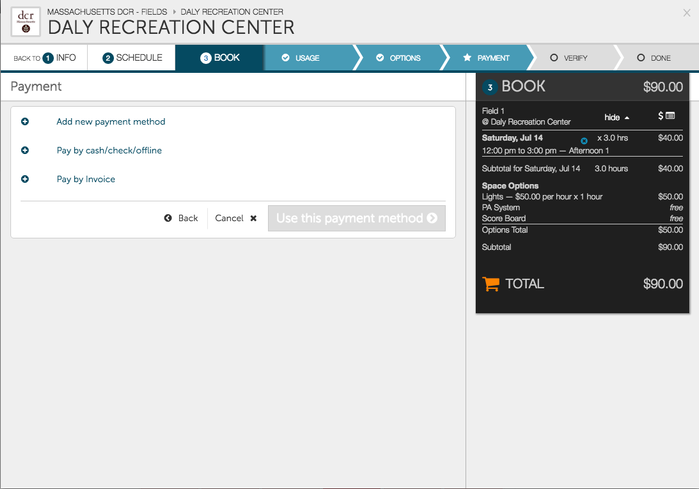
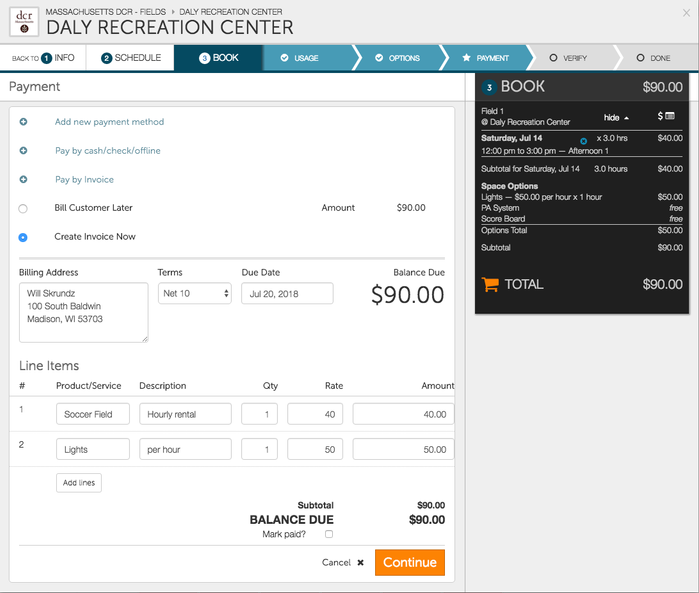
- After choosing your setup items, you will reach the Payment screen. Here, you can pay for the reservation via Debit/Credit card, Cash/Check/Offline method, or by invoice. If you choose to invoice the user, you can either Bill the Customer Later or Create the Invoice Now. Creating the invoice now will let you create an invoice and let you choose to charge as much or little as you would like for the rental. After choosing the payment method or creating the invoice, click Continue to proceed.
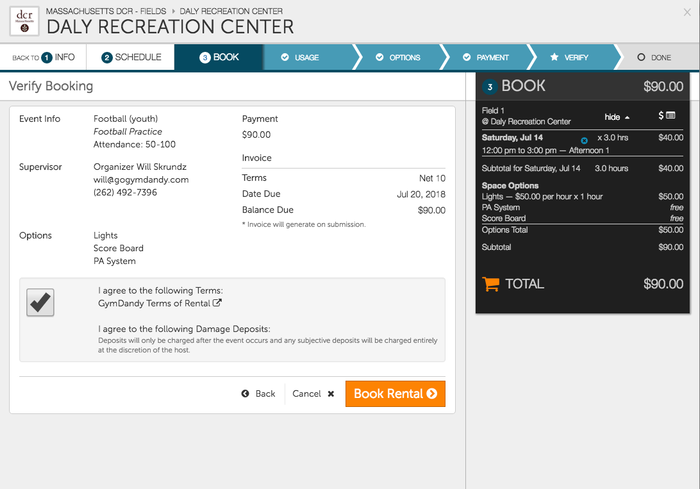
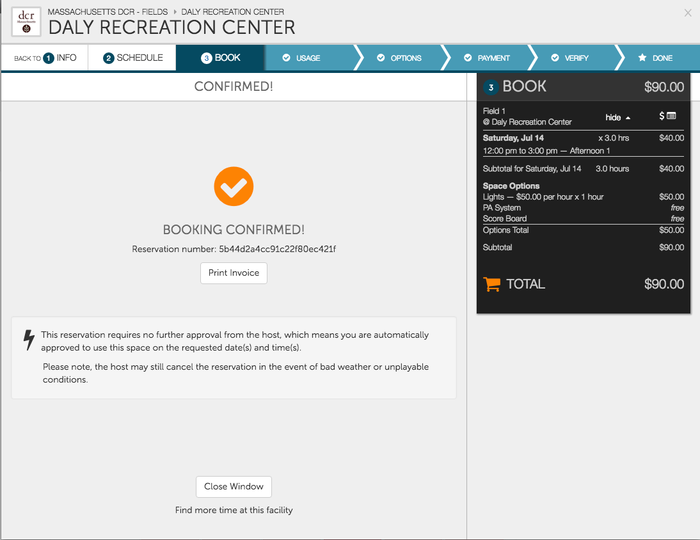
- The final page before you finalize your booking provides you with all information related to the rental including setup items, payment or invoice, terms of rental and more. If everything is correct, click the check box to agree to terms and click Book Rental to finish booking the space. After choosing Book Rental, you will notice that the booking is confirmed. If you choose to pay by invoice, you may also immediately print the invoice immediately after making the rental.