There are a few methods in which Spotz allows for invoicing. As an admin of an organization, you can monitor your large rental groups and charge them one flat price for all of their rentals, via invoice. You can also help renters check out and defer payment at the time of the rental and create an invoice to be paid at a later date.
CREATING INVOICES FOR GROUPS
For rental groups who receive a discount on rentals, you can send out an invoice to collect payment for a few or all of the rentals that have occurred.
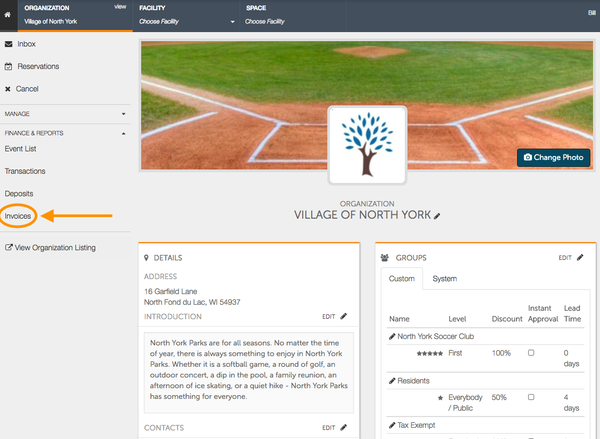
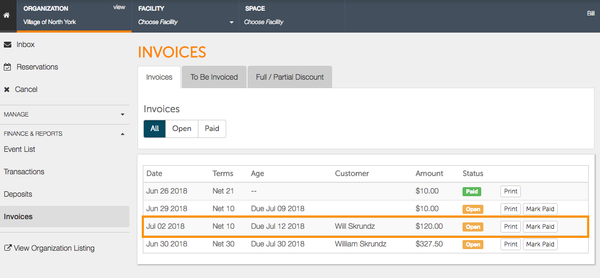
- To create an invoice, begin on your organization's Spotz page and on the left-hand side under Finance & Reports, select Invoices.
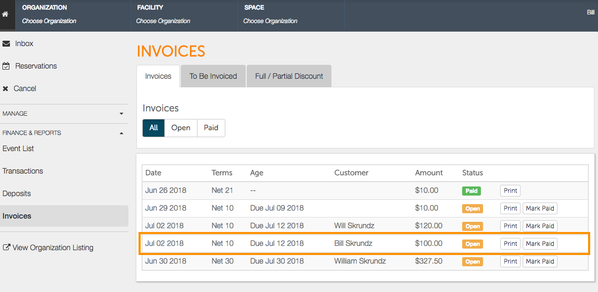
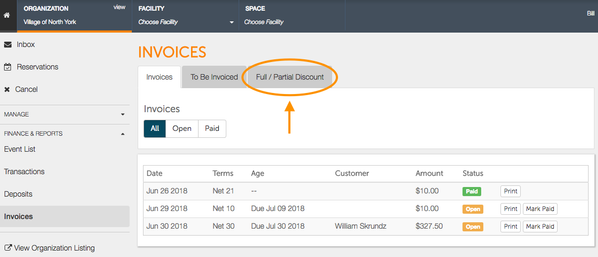
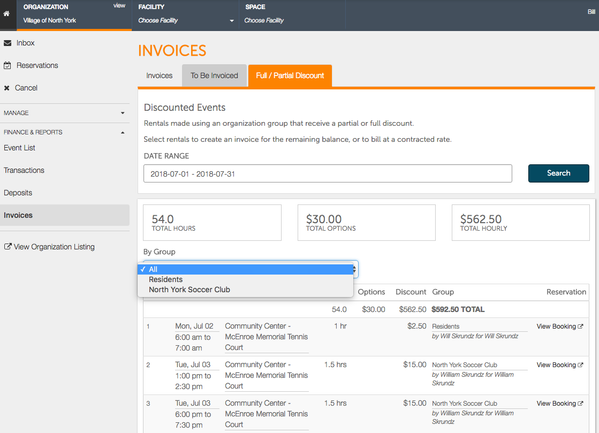
- Within the Invoices page, you will immediately see open and paid invoices for your organization. From this screen, you can also print out existing invoices or mark open invoices as "Paid". There are three tabs on the top of the page - Invoices, To Be Invoiced, and Full/Partial Discount. If you click on Full/Partial Discount, you can begin creating an invoice for your discounted groups.
- Once you are on the Full/Partial Discount tab, you will see all of your organization's discounted rentals for a given date range. Set the date range for the events that you would like create an invoice for and select Search. Once your date range has been chosen, choose the group that you would like to invoice.
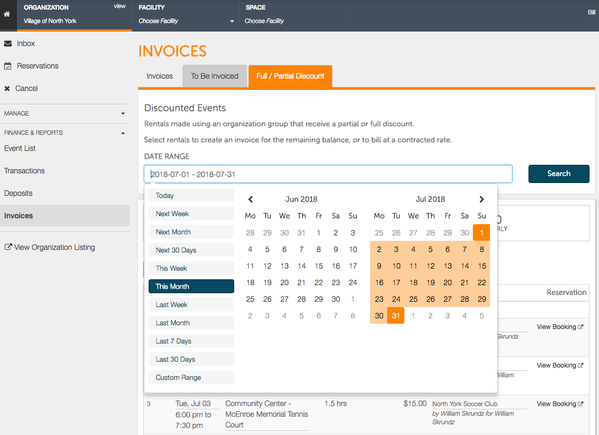
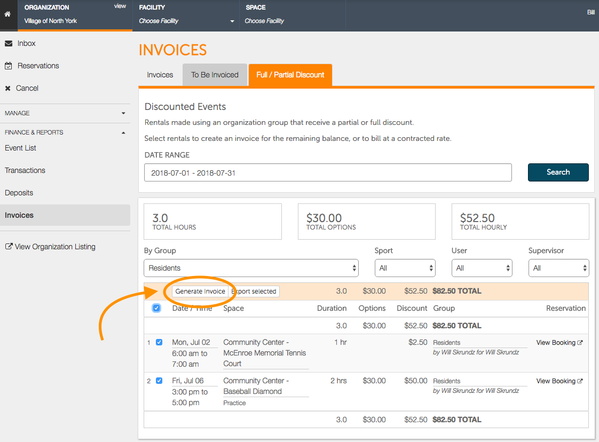
- After choosing your date range and group you will have the option of choosing which events to invoice for. Click the checkbox next to the events you would like to generate the invoice, or you can click the checkbox near the top to choose all events. Once you have selected your events, you can go ahead and choose Generate Invoice
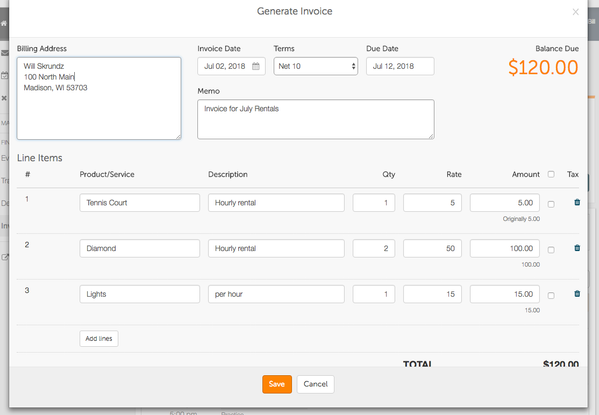
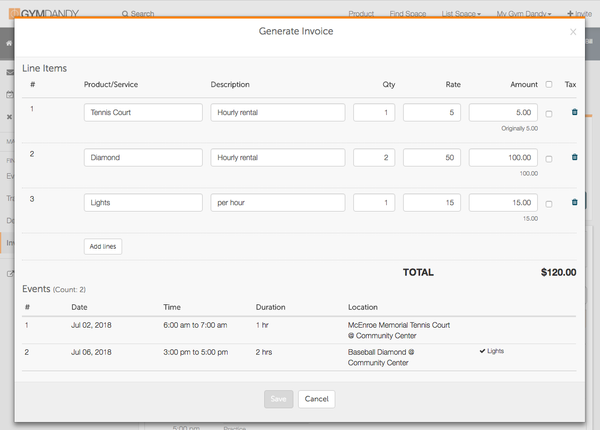
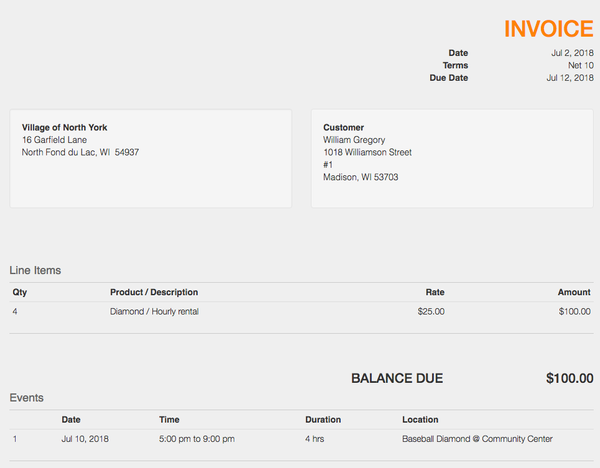
- Once you generate the invoice, you will have various options and text boxes that you can edit. Near the top, you will have a few text boxes to input a billing address, memo, invoice date, terms, and a due date. Underneath, you will have Line Items in which you can charge for various items such as lights, rental fees, and other add-ons or features. The Line Items will display descriptions of each item as well as a quantity and rate of each item. Additionally, the events that you had originally selected to invoice for are listed below the Line Items. Select Save when you are finished creating your invoice.
- Once you have finished creating the invoice, you can select the Invoices tab near the top of the page to see the outstanding invoice. As soon as the renter completes the payment on the invoice, you can mark the invoice as "Paid". You will be able to print all invoices, even after they are paid off.
CREATING INVOICES FOR CUSTOMERS
If a customer comes to make a rental in person, you have the ability to have the customer pay via debit/credit card, cash, check, and now, via invoice.
- Begin the reservation process as though you are making an offline booking.
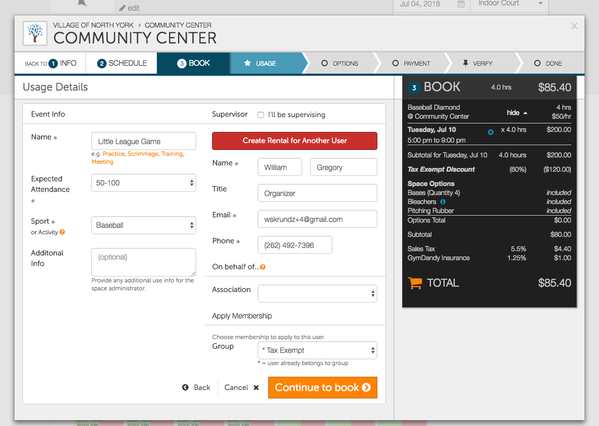
How Do I Make An Offline Booking? - Once you have begun making a rental and get to the Usage Details screen within the booking window, click on Create Rental for Another User.
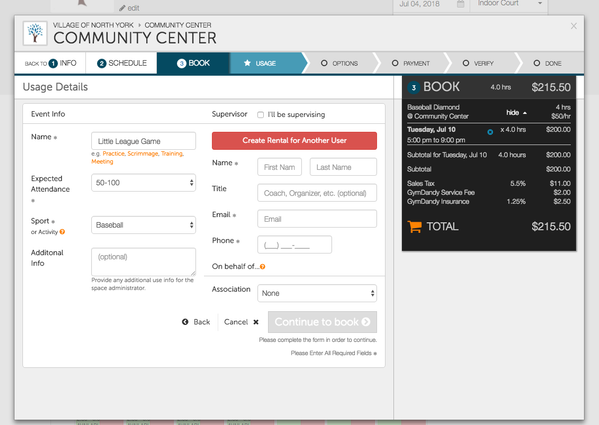
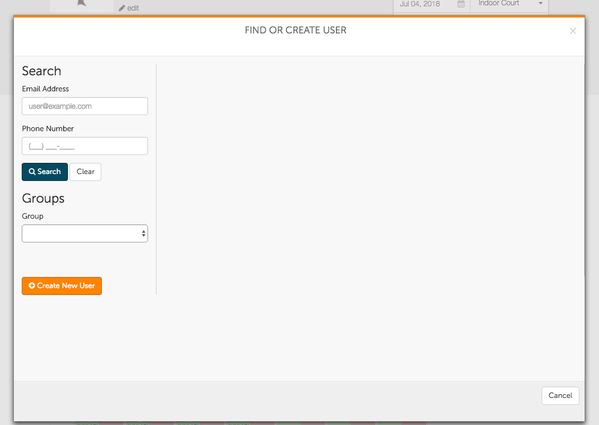
- Once you click "Create Rental for Another User", you will be directed to a window that gives you two options, search for an existing user, or create a user. If the customer you are making the rental for already has a Spotz account, you can search for the user by their email address, phone number or group, if applicable. If the customer does not have a current account, you can create the user by clicking on +Create New User.
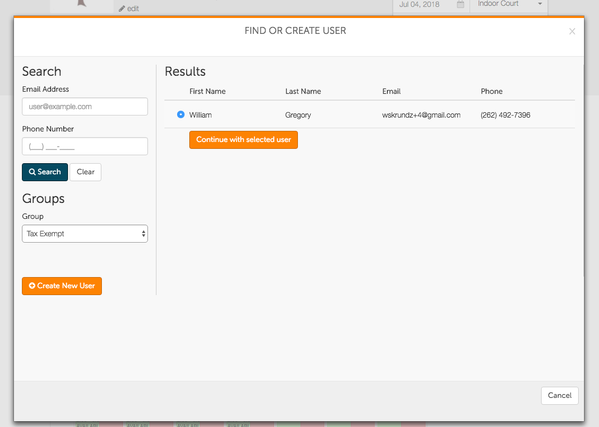
- Once you choose a group, members of that group will populate. Choose the user from the results and click Continue with Selected User. After choosing your user, continue through the booking process.
- Once you are at the payment screen, you have a few options - Add new payment method (Debit/Credit), pay by check/cash/offline or pay by invoice. If you choose to Pay by Invoice, you have the option of billing the customer later or creating the invoice now. If you choose to bill the customer later, you will need to create an invoice later on.
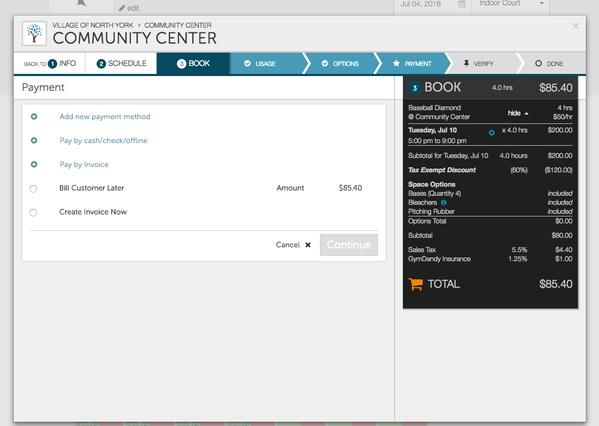
- By clicking Create Invoice Now, you will have the ability to create the invoice on the spot and charge a different amount for the rental. You will be required to fill out all of the fields including billing address, terms, due date and your line items. Click Continue to finish the booking process.

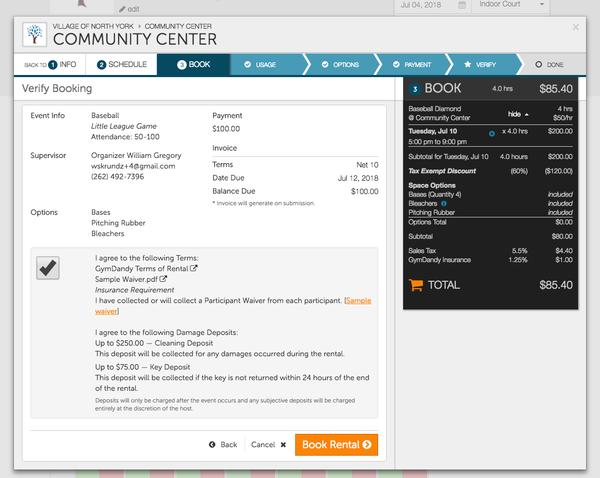
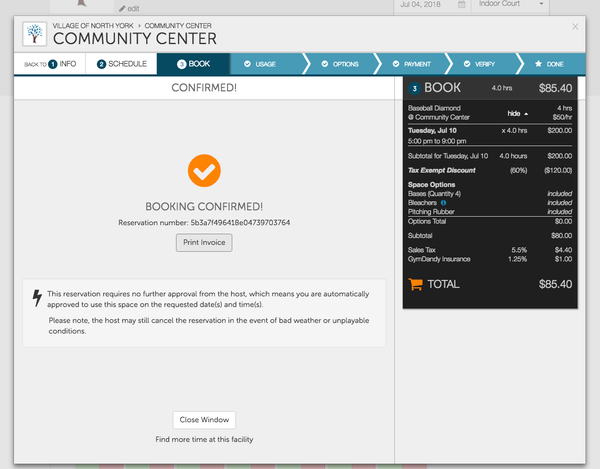
- After creating your invoice you will be directed to the final page of the booking menu. The newly created invoice will appear so that you can verify the correct amount of your booking. If everything appears correctly, you can agree to terms and book your rental. Immediately after booking the rental, you will see that that the booking is confirmed as well as an option to print the invoice.
- Once the booking is finished and the invoice is created, you can find the outstanding invoice within the Invoices page.